Deaconess Butterfly
Re-Written by Carolyn Groves
January 2002
Start at head, work right side then left side.
(Head) R 7--4--7, cl, rw.
(Body) Ch 5-5,cl rw.
(Tail) R 4-5-5-4, cl, rw.
(Upper Wing inside) Ch 5+ (join to p on body) 5-5-5, cl, rw. R 10-4-4-10, cl, rw. Ch 5-5-5+5-3+2-5, cl. (first join to p on ring, next join to next p on ring, Join to top of tail ring.
(Lower Wing inside) Ch 5+5-5, cl rw (join to last p of prev c). R 7-3-10, cl, rw. Ch 5-5-3+3, cl rw
(join to p on ring). Join to first picot on tail ring.
(Outside of wings) Ch 3-2-1+2-3-1+2-3-3-3-1+2-3, cl. Joins are done on picots of chain of lower
wing. Join to picot between wings. Ch 3++2-3-3-1+2-3-1+2-3-3-3-1+2-3-1+2-3. First join is a
double (last picot of previous chain and first p on upper wing) all other joins are on picots of
upper wing chain. Join to bottom of head.
Ch 5-5, cl. Join to top of tail ring.
Work upper wing, lower wing and outside wings again for left side of butterfly.
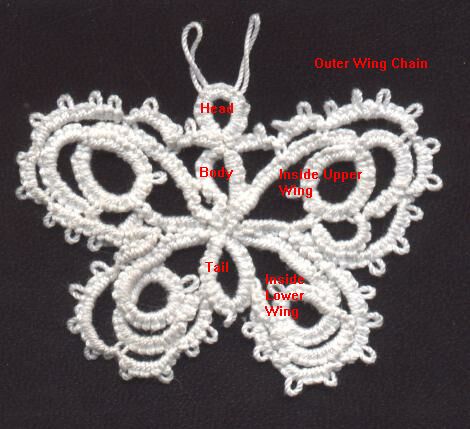
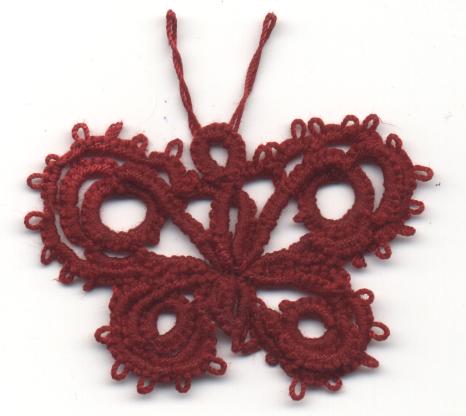
This first attempt was done in size 10 opera thread. I thought it would be helpful to label the different parts. This butterfly is worked from the head down, then wings on one side, wings on the other side. It is mostly chain work with 6 rings. The hardest part is keeping track of the outside picots while, at the same time doing the joins to the inside wing picots! I did try doing a hand drawn diagram but it never turned out right. There is too much going on in the center to get a good grasp on the elements.
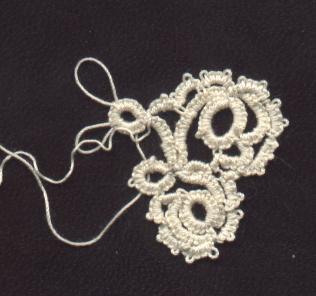
The example on the right shows half of a butterfly. It tends to
curl and twist but as the second half is worked the unit starts
taking shape.
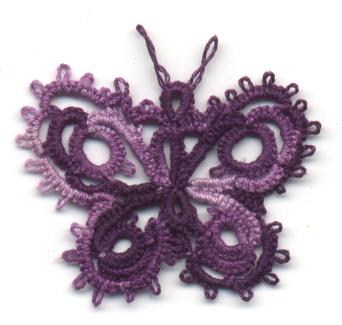
Maggie Wagner originally asked me to look at this pattern after we did the
antique butterfly in
the November 2001 class. The picture looks very similar to it but there is a major difference in
construction.
My first read through the pattern showed several problems and the written pattern didn't match
the picture. So my first task was to work a pattern to match (some what) the picture!
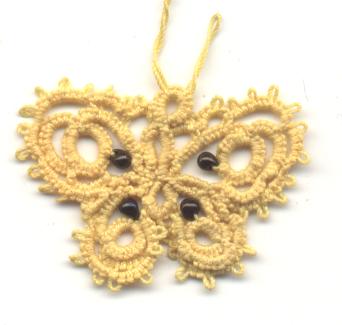
 Once I figured out the basic flow of the pattern
and the placement of picots and joins I started
playing. The left one is done in LBH thread. It
is a size 40 thread and not usually what I work
with. I discovered that thread heaven does
wonders taming this thread. The one on the left
is size 20 opera. The beads are black fringe
beads.
Once I figured out the basic flow of the pattern
and the placement of picots and joins I started
playing. The left one is done in LBH thread. It
is a size 40 thread and not usually what I work
with. I discovered that thread heaven does
wonders taming this thread. The one on the left
is size 20 opera. The beads are black fringe
beads.
I liked the effect of the fringe beads and played some more!
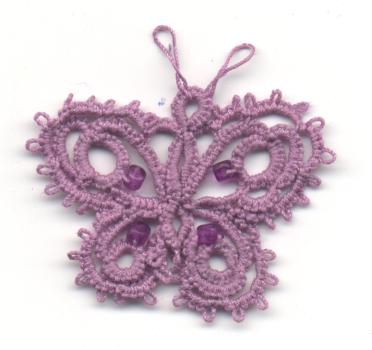
The purple one on the left has a matching purple bead on the inside rings. But my
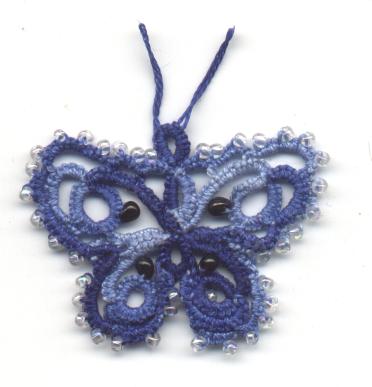
favorite is the one on the right. It is done in DMC perle 8 variegated blue,
with fringe beads inside and iridescent seeds on the outer edges. Surprisingly the
outer beads help make the motif lie flat and give shape to the wings.
This was one of the first tests. There are
several "mistakes" in it. Can you find
them? It just goes to show that changes in
the pattern are not necessarily bad. In this
case it was though. I just couldn't bear to
use this one for an example except as an
example of a boo-boo!
Click here to return to my Home Page
Questions? Comments?