Using an existing pattern as the basis for new designs
written for the online class in 2000
Carolyn Groves (mdtatter@yahoo.com)
In the mid 1970's, while working in Washington, D.C. I had access to a wonderful bookstore
that had a fantastic stock of needlecraft books. I managed to collect nearly all the Dover
printings of the knitting and crochet books. I also acquired all the tatting books even though I
didn't know how to tat. I figured that one day I would learn and the designs were so beautiful I
just had to have the books just to admire the pictures.
I tried teaching myself shuttle tatting off and on for about 6 years. I could manage the ring but
chains and joins totally eluded me. In 1986 I attended a supplier's market in Washington and
signed up for a 2 hour seminar on needle tatting. The big light bulb went on! I came home,
dragged out all the Dover tatting books and haven't stopped since. It never occurred to me that
the pattern was for shuttle not needle. I simply translated in my mind and worked up anything
that struck my fancy.
Once I had the needle technique under my belt I returned to the shuttle and was amazed that now
it all made sense! I took one class from a local Mennonite lady and was off and running. I have
been teaching needle and shuttle tatting locally for about 10 years.
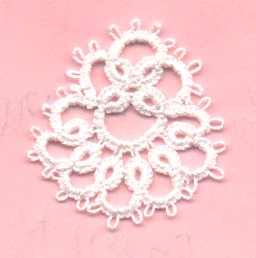
Original pattern as found in "Tatting Patterns and Designs" by Blomqvist & Persson (page 35 star #4):
This motif has always intrigued me. I have played around with it for years. My problem with the original was the top chain which contains an even number of picots. When made exactly to the pattern it is lopsided if made to hang from a picot.
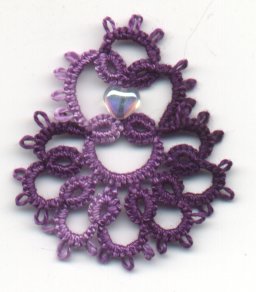
My first design change was to increase the top chain to contain an uneven number of picots.
My second change was to introduce a bead between the 4 inner rings. This was done by making the first picot long then placing a bead on the picot before joining the third ring.
After making this variation it suddenly occurred to me that the motif now resembled an angel or a bell. After creating a number of white ones I started experimenting with variegated colors.
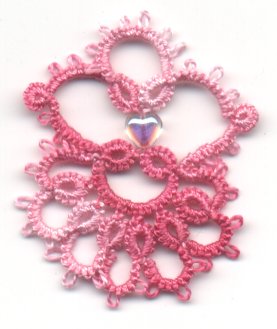
While looking at the above design I started wondering how I could make the motif more like an angel. I pulled out the books (Rebecca Jones' and Monica Hahn's) and examined the angels and their wings.
I first tried extending the first and third chain to give more space, and
putting more stitches in the "head" area. Although this was somewhat
better I wasn't truly happy with the results. It seemed there was too
much open space where I wanted the wings to be.
My next step was to create a more detailed "wing" using Monica Hahn's technique.
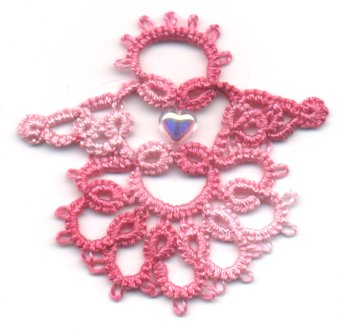 As a novice designer I wasn't thinking ahead when working this. It never occurred to me that the
second wing would be worked "upside down". It took a few minutes to figure out how the upper
chain should be done to mirror image the first wing.
As a novice designer I wasn't thinking ahead when working this. It never occurred to me that the
second wing would be worked "upside down". It took a few minutes to figure out how the upper
chain should be done to mirror image the first wing.
Variation 3: R 6--6,rw; C 3-3-3-3-3-3-3, rw; R 6+6,rw;
Wing 1:C 3,rw; R 4-2-2,rw; C 3,rw; R 2+1-3,rw; C3,; JN12;
C 3+3+3,rw; (Chain joins to picots on rings). R 6+6,rw (place bead on picot before joining); C 3-3-3-3-3-3-3-3,rw; R 6+6,rw.
Wing 2: C9, JN12, C3,rw; R 3+1-2,rw; C 3,rw; R 2+2+4,rw; C 3. (first ring joins between ds 3 and 4 of C9; second ring joins to first ring and between ds 6 and 7 of C 9)
Join Chain to base of first Ring. *C 3-3-3-3,rw; R 6+6,rw; Repeat
from * 5 more times. (rings join to picots on first chain). C 3-3-3-3.
Join last chain to base of ring 2
I'm still not sure if this is the final design. After working on this simple motif I now have a great deal of respect for those designers who "see" an item in their mind and are capable of creating it with shuttle or needle and thread!